Link Google Sheets to Excel -
It’s easy, free and reliable!
Linking Google Sheets to Excel is something I use every day. Google Sheets doesn’t yet have the features (or the market share) as Excel, which means I often find myself needing the data back in Excel.
This is especially true when I have automatic scheduling triggers and scripts on Google Sheets, but want the data in Excel. Due to the Google Sheet’s being a cloud platform, scheduling macros are a lot easier to do than with Excel.
Steps
1. Export the sheet
2. Create query
3. Format data
4. Done
1. Export your Google Sheet data
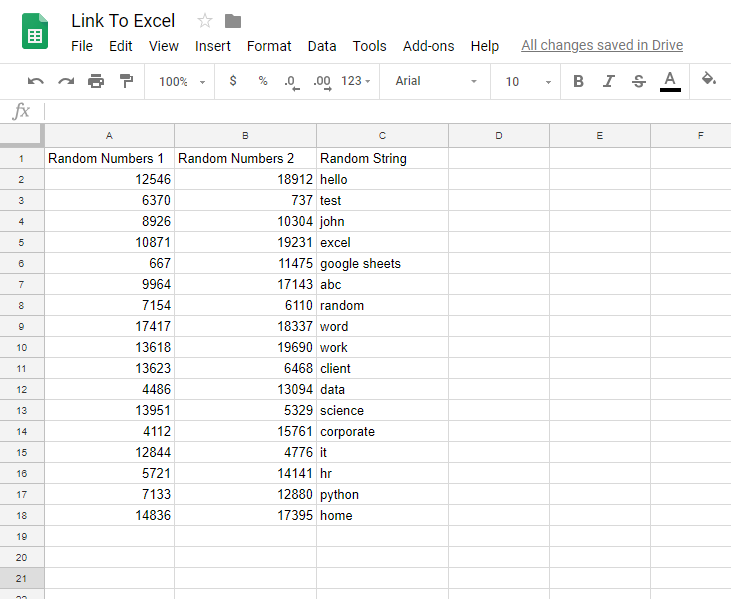
1. Go to your Google Sheet containing the data you want to export. In my example I have 3 columns of data.
This can be anything you like, but it will be exported to Excel in a table/database format. So I recommend you process your data to a table like structure.
Your table can range from one value to how ever many you like, but it will always be a table in Excel. You can’t link A1 in Google Sheets to A1 in Excel, at least not directly. You would export A1 as a table, then link to the table in A1 with Excel. You will see what I mean below.
2. Click on:
a. File (top left)
b. Publish to the web
c. Link
d. Sheet1 (or whatever sheet your data is in)
e. Comma-separated values (.csv)
f. Published content & settings
g. Automatically republish when changes are made is ticked
h. Publish (blue button)
i. Copy the link (if done correctly the very end of the link should be =csv)
You have now created a link that downloads your sheet as a CSV file. If you copy the link into a browser, it will download the file. All we want now is Excel to automatically download this whenever you hit the “refresh” button, similar to a pivot table.
The link will automatically update roughly every 5 minutes. So if you make a change to your data, the link will update in realtime.
2. Importing into Excel
1. Open Excel
2. Go to Data tab
3. Click on:
a. New Query
b. From File
c. From CSV
d. Copy in your link to the File name: box and click Open
4. It will think for a few seconds, then ask you about accessing web content. Leave the defaults and click Connect
5. A snippet of your data will now pop up! You can either:
a. Load (this will create a new sheet and load all the data as a table)
b. Load To… (select exactly where you want the table created)
c. Edit (this opens the Power Query Editor - this allows to you get your data to exactly the criteria you are after.
For example delete unneeded rows/columns, delete text, add new calculated columns and so on) Definitely have a play here
6. For now click Load
That’s it. You now have your data in Excel!
Add a few more rows to Google Sheets, wait a few minutes, then hit the Refresh All button in Excel to see your new data appear (unfortunately adding more columns requires you to repeat the entire process). Make sure any formulas in Excel aren’t located below the table!
To make the table auto update when Excel is opened, or update after x minutes (latter is perfect for dashboards):
1. Click on the table
2. On Data tab, click on the drop down for Refresh All
3. Connection Properties
4. Tick Refresh data when opening the file and/or Refresh Every x Minutes
3. Easy as that
You now have (almost) live data going from Google Sheets to Excel. Why not do this for your Google Form results, and sit back and watch your data go directly into Excel!
Or create a Google Sheets trigger and get your results stored in Excel, without fluffing about with Excel Macro Scheduling!
The possibilities are endless. However, I bet you are thinking “how can I get excel data into Google Sheets?”. Good thought, and while this is a little more complex, it is possible and another thing I do on a daily basis. Perfect for mobile dashboards. Check back for a tutorial on this.


